
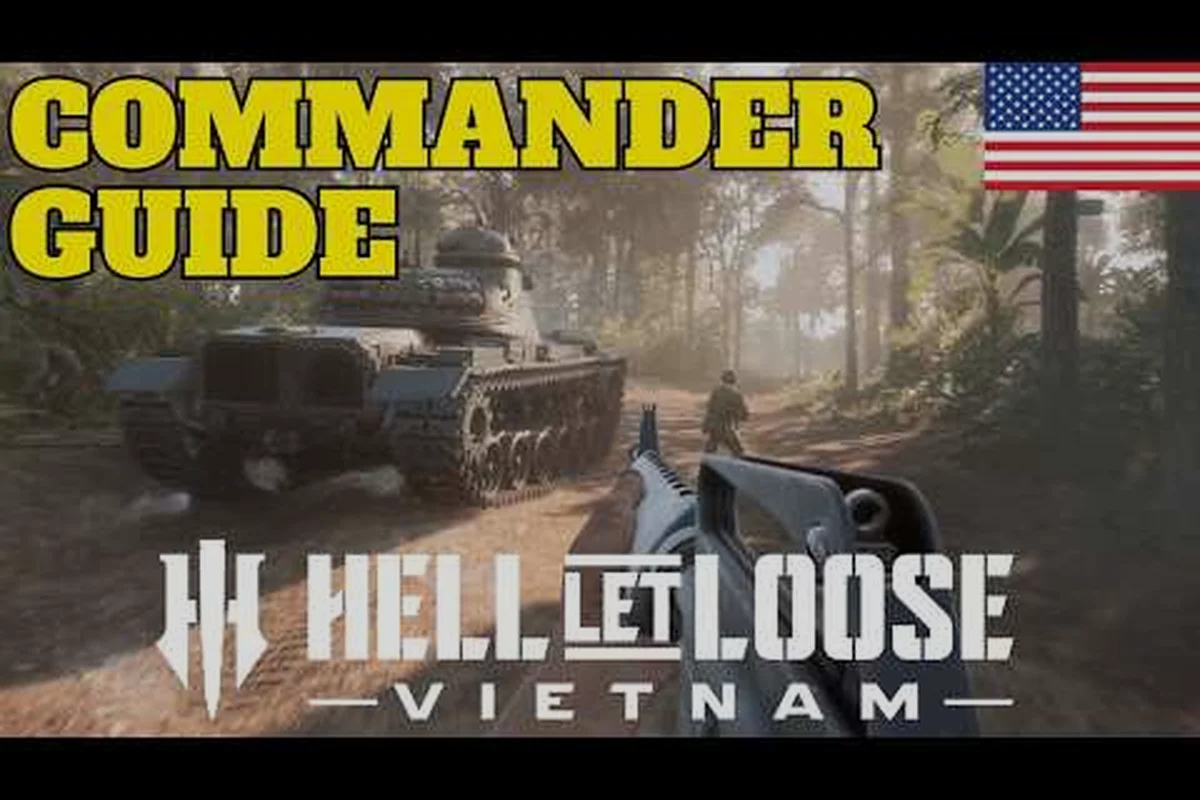
The hell let loose vietnam commander guide is the single most important resource for any player who wants to win matches, because the Commander role controls the spawn network, supply economy, and strategic tempo for all 50 soldiers on their team. Unlike squad leaders who manage a single unit, the Commander's decisions ripple across every squad on the map, and a single misplaced garrison or mistimed supply drop can collapse an entire offensive. This guide breaks down the exact mechanics, timings, and decision frameworks you need to lead your team to victory, drawing on verified data from the official game page and community testing from the Steam forums.
The Commander Role: Responsibilities and Core Mechanics
The Commander sits at the top of the chain of command in Hell Let Loose: Vietnam, a 50v50 tactical first-person shooter developed by Expression Games and published by Team17. According to the official game page, the Commander coordinates 17 specialised roles across Command, Infantry, Recon, Armour, Helicopter and Mortar units, and their primary job is to build and maintain the team's spawn infrastructure while directing squad leaders through the leadership voice channel.
The Commander's toolkit revolves around three core abilities that define the role's effectiveness: the Supply Drop, Airhead, and Precision Strike. The Supply Drop is your primary logistics tool, delivering 50 supplies per crate to establish forward garrisons—critical in Vietnam's dense jungle maps where vehicle access is often blocked. The Airhead acts as a mobile spawn point, allowing a full squad to flank enemy defensive lines, but it's vulnerable to destruction and requires careful timing. The Precision Strike, meanwhile, is a devastating artillery barrage that can wipe out a well-fortified enemy garrison, though its long cooldown demands you save it for high-value targets rather than reactive use.
-
Garrison placement — the backbone of your team's spawn network, allowing squads to deploy across the map
-
Supply drops — the resource lifeline that enables garrison construction and defensive fortifications
-
Recon and artillery coordination — using the leadership channel to direct fire support and intelligence gathering
The Commander also manages the team's resource economy, which fuels vehicle spawns, artillery strikes, and supply drops. Because the role requires constant map awareness and communication, most successful Commanders spend the majority of their time on the map screen rather than in direct combat, which is why the role suits players who prefer strategic thinking over firefights.
The official Wikipedia entry confirms that the game runs on Unreal Engine 5 and features two teams of up to 50 players fighting as US Armed Forces versus the Vietnamese People's Army and Viet Cong. This asymmetry matters for Commanders because each faction has different spawn mechanics: the US relies on helicopters for supply drops and rapid redeployment, while the NVA builds tunnel networks that function as mobile spawn points, as detailed in the tunnel warfare guide.
Command Channel Etiquette and Information Flow
The Commander's most powerful weapon is not a rifle but the leadership voice channel, which connects them to all squad leaders simultaneously. Effective Commanders use this channel to broadcast enemy movements, coordinate attacks, and request specific squad actions, but they must avoid flooding the channel with unnecessary chatter. The official game page confirms that squad communication uses three channels: leadership voice, unit voice, and proximity chat, plus map pings, which means Commanders must learn to filter information and relay only what matters to each squad.
A good rule of thumb is to keep leadership channel broadcasts under 10 seconds each, because squad leaders also need to communicate with their own units. Commanders should also use map pings liberally to mark enemy positions, garrison locations, and attack routes, since visual markers persist longer than voice callouts and help squad leaders orient themselves without asking for clarification.
Garrison Placement: Building the Spawn Network
The hell let loose vietnam garrison guide is essential reading because garrisons are the most important structures in the game, functioning as permanent spawn points that allow your team to maintain pressure on the objective. A garrison costs 50 supplies to build, requires an Officer or Commander to construct, and can be placed anywhere on the map except within 50 meters of an enemy garrison or 100 meters of a locked capture point.
The key to effective garrison placement is understanding the map flow and anticipating where your team will need spawn points in the next 5-10 minutes. A garrison placed too far from the action forces your team to walk long distances, while a garrison placed too close to the enemy frontline gets destroyed quickly. The ideal placement is 100-200 meters behind your current defensive line, in a location that provides natural cover and multiple approach routes.
| Garrison Type | Placement Distance | Supply Cost | Primary Use |
|---|---|---|---|
| Offensive Garrison | 100-200m from enemy point | 50 supplies | Supporting attacks on enemy positions |
| Defensive Garrison | 50-100m behind friendly point | 50 supplies | Protecting the current objective |
| Flanking Garrison | 200-300m to the side | 50 supplies | Enabling surprise attacks from unexpected angles |
| Fallback Garrison | 150-250m behind friendly lines | 50 supplies | Providing a safe spawn if the frontline collapses |
Commanders should aim to maintain at least 3 active garrisons at all times: one defensive garrison near the current objective, one offensive garrison positioned for the next push, and one flanking garrison that provides tactical flexibility. This redundancy ensures that the team can continue fighting even if one garrison is destroyed, and it prevents the enemy from locking down your spawn network with a single well-placed attack.
Garrison Placement Zones and Map Awareness
The Vietnam maps feature dense jungle terrain, river networks, and elevation changes that dramatically affect garrison placement. According to community reports from the Steam Community Hub, the best garrison locations are often in dense foliage that hides the garrison from aerial reconnaissance, or in basements and tunnels that provide natural protection from artillery and bombing runs. Commanders should avoid placing garrisons in open fields, on hilltops, or near obvious landmarks, because these locations are easy for enemy recon units to spot and destroy.
The NVA faction has a unique advantage in garrison warfare because their tunnel networks function as buildable spawn points that can be constructed underground. This means NVA Commanders can place spawn points in locations that are nearly impossible for US forces to detect, which is why the outpost placement guide recommends that NVA Commanders prioritize tunnel construction over traditional garrison placement in the early game.
Supply Drops: Managing the Resource Economy
The hell let loose vietnam supply drop guide focuses on the Commander's ability to call in supply drops that provide 100 supplies per crate, which are essential for building garrisons, fortifications, and defensive structures. Supply drops have a cooldown of 5 minutes per drop, and the Commander can call them in from the map screen, with the crate descending via parachute at the designated location.
Effective supply management requires Commanders to think several steps ahead, because a supply drop called in at the wrong time or location can waste the team's most valuable resource—especially when the 50-supply C-ration crate from a Commander drop is the only way to fund a Garrison outside of a Support player's 25-supply personal pack. A misplaced drop not only burns the 5-minute cooldown but also telegraphs your flank to enemy Recon, who can dismantle the resulting Garrison before it ever becomes operational. The key principles of supply management are:
-
Always keep 100 supplies in reserve for emergency garrison construction when the frontline shifts unexpectedly
-
Call supply drops before you need them, not after, because the 5-minute cooldown means you cannot react quickly to sudden changes
-
Coordinate supply drops with squad leaders, so that engineers and support players are ready to build immediately when the crate lands
-
Use supply drops to bait enemy recon, since a visible supply drop often attracts enemy attention that can be exploited for ambushes
The US faction has a significant advantage in supply delivery because their helicopters can transport supplies directly to frontline positions, as detailed in the Huey helicopter guide. This allows US Commanders to establish garrisons much faster than NVA Commanders, who must rely on supply drops and support players carrying supplies on foot.
Supply Drop Timing and Prioritization
The timing of supply drops is arguably more important than their placement, because the 5-minute cooldown creates a resource bottleneck that Commanders must manage carefully. Based on community testing, the optimal supply drop cadence is to prioritize the opening 2-minute window for a Garrison blueprint near the first captured objective, then hold the next drop for a defensive red-zone Garrison rather than spending it on a forward Outpost that the enemy can dismantle in seconds. This sequencing ensures your team maintains spawn redundancy during the initial engagement, preventing a full wipe that would otherwise leave the entire squad running from HQ.
| Game Phase | Supply Drop Priority | Reasoning |
|---|---|---|
| Opening (0-5 min) | 2 drops for offensive garrisons | Establish map control before enemy defenses solidify |
| Mid-game (5-15 min) | 1 drop for defensive fortifications | Protect the current objective while preparing the next push |
| Late-game (15+ min) | 1 drop for flanking garrisons | Create alternative attack routes when the frontline stalls |
| Overtime | Emergency drops only | Preserve supplies for critical garrison rebuilds |
Commanders should also communicate their supply drop plans to squad leaders in advance, so that support players can position themselves to collect supplies immediately. A supply drop that sits on the ground for more than 60 seconds is a wasted resource, because the enemy can destroy it or use it to track your team's intentions.
Outpost Timing and Squad Coordination
The hell let loose vietnam outpost guide covers the second critical spawn mechanic: outposts, which are squad-level spawn points that allow individual squads to deploy close to their current objective. Unlike garrisons, outposts are placed by squad leaders, cost no supplies, and have a 40-second cooldown after deployment. However, the Commander plays a crucial role in outpost timing by directing squad leaders on when and where to place their outposts.
The Commander's responsibility is to orchestrate outpost placement across all squads, ensuring that the team maintains a distributed spawn network rather than clustering all outposts in one location. A common mistake among new Commanders is allowing all squad leaders to place outposts in the same area, which creates a single point of failure that the enemy can exploit with artillery or a coordinated push.
| Outpost Strategy | When to Use | Commander's Role |
|---|---|---|
| Distributed Outposts | Defensive play | Direct squads to spread across the defensive line |
| Stacked Outposts | Offensive pushes | Concentrate spawns near the attack objective |
| Flanking Outposts | Surprise attacks | Coordinate with recon squads for hidden placement |
| Fallback Outposts | High-risk situations | Maintain a safe spawn away from the frontline |
Commanders should also monitor the outpost cooldown timers of their squad leaders, because a squad without an active outpost is significantly less effective in combat. When a squad's outpost is destroyed, the Commander should direct that squad leader to reposition immediately, rather than waiting for them to notice the loss themselves.
Recon Squad Coordination and Information Warfare
The Commander's relationship with recon squads is one of the most important dynamics in the game, because recon units provide the intelligence that drives all strategic decisions. Recon squads can mark enemy positions, destroy enemy garrisons, and provide overwatch for advancing infantry, but they require clear direction from the Commander to be effective.
According to the official game page, the game features 19 specialised roles, and the recon roles are among the most impactful for Commanders. A good Commander will treat the two-man Recon team as their forward eyes and ears—the Spotter’s ability to place a garrison or outpost deep behind enemy lines hinges on the sniper’s suppression, while the team’s proximity to enemy artillery or supply drops can call in precise airhead or bombing-run coordinates. Without this intel loop feeding your supply drop placements, your offensive pushes risk stalling blind into prepared defensive lines.
-
Assign recon squads specific objectives at the start of each match, such as destroying enemy garrisons or marking artillery positions
-
Request regular status updates from recon squads, but avoid micromanaging their movements
-
Use recon intelligence to adjust garrison placement, moving defensive garrisons away from areas where the enemy is concentrating forces
-
Coordinate artillery strikes with recon markings, ensuring that fire support lands on confirmed enemy positions rather than guesses
The Commander should also use the leadership channel to relay recon intelligence to other squad leaders, because infantry squads cannot always see the markers that recon units place on the map. A concise broadcast like "Recon has marked an enemy garrison at grid 4-2, infantry squads push from the east" provides actionable information without flooding the channel.
Advanced Commander Strategies and Decision Frameworks
Beyond the fundamentals of garrison placement, supply management, and outpost timing, successful Commanders develop advanced strategies that adapt to the flow of each match. The hell let loose vietnam commander guide would be incomplete without covering these high-level decision frameworks, which separate average Commanders from those who consistently win matches.
The most important advanced skill is reading the enemy Commander's intentions, which requires analyzing their garrison placement patterns, supply drop locations, and attack routes. If the enemy Commander consistently places garrisons on the eastern flank, you can anticipate their next attack and position your defenses accordingly. This counter-commander thinking is what separates tactical players from strategic leaders.
Offensive vs Defensive Command Styles
Commanders typically fall into one of two styles: offensive Commanders who prioritize attacking the enemy objective, and defensive Commanders who focus on holding ground and counter-attacking. Each style has distinct advantages and disadvantages. An offensive Commander in Hell Let Loose Vietnam thrives on momentum, using the supply drop to rapidly establish forward garrisons and outposts that keep pressure on the point; however, this aggressive posture often leaves the defensive line thin, making your team vulnerable to a flanking counter-attack that can dismantle your spawn structure in minutes. Conversely, a defensive Commander excels at fortifying the strongpoint with layered garrison placements and pre-planned supply drop caches, but can become too passive, allowing the enemy to dictate the pace and bleed your team's manpower through attrition. The best Vietnam Commanders dynamically shift between these poles, reading the flow of battle to know when to push for the cap and when to consolidate, ensuring your spawn points are never overextended nor isolated.
| Command Style | Strengths | Weaknesses | Best Maps |
|---|---|---|---|
| Offensive | Maintains constant pressure, forces enemy errors | Vulnerable to counter-attacks, high supply consumption | Central Highlands, Operation Starlite |
| Defensive | Conserves resources, builds strong fortifications | Can lose momentum, struggles to break stalemates | River Delta, North Vietnam |
| Balanced | Adapts to match flow, flexible resource allocation | Requires constant attention, harder to execute | All maps |
The best Commanders are balanced, switching between offensive and defensive styles based on the match state. In the early game, an offensive approach helps secure map control, while the late game often requires a defensive posture to protect a lead. The key is recognizing when to transition between styles, which comes from experience and careful observation of the enemy's movements.
Handling Adversity and Comeback Scenarios
Every Commander will face situations where their team is losing badly, and the ability to orchestrate a comeback is what defines elite leadership. The most common comeback scenario involves the enemy team overextending after a successful push, which creates opportunities for flanking attacks and garrison destruction.
When your team is losing, the Commander should stop treating the map as a single front and switch to a triage-based logistics rotation: identify which of your two remaining Garrisons is closest to the active enemy push, then chain-deploy a Supply Drop (50 supplies) to that position while simultaneously ordering a Support player to drop a crate for a second, hidden Garrison. This creates a two-point fallback network that forces the enemy to split their assault, buying your team the 60–90 seconds needed to re-establish a forward Outpost. Prioritize defending the Garrison that anchors your final defensive line, and if both are lost, fall back to the H.Q. sector and rebuild from the default spawn—never waste Command resources on a solo tank or a single straggler's request when the team structure is collapsing.
-
Focus on garrison defense rather than attacking, because losing your spawn network makes a comeback impossible
-
Use recon squads to locate enemy garrisons, then coordinate a focused attack to destroy them
-
Conserve supplies for emergency garrison rebuilds, rather than spending them on offensive fortifications
-
Communicate a clear comeback plan to squad leaders, so that everyone understands their role in the recovery effort
The resource strategy guide provides additional detail on managing the late game economy, including when to prioritize supply drops over vehicle spawns and how to stretch limited resources across multiple objectives. In a losing match where manpower and munitions are bleeding out, a commander must often cancel planned tank spawns—especially the expensive M48 Patton at 300 fuel—to fund a critical supply drop that keeps a defensive garrison chain alive on the final point. This trade-off is brutal but necessary: a single well-placed supply drop can enable a garrison that holds a cap zone for an extra five minutes, whereas a lost vehicle merely accelerates the collapse. Understanding these thresholds, such as knowing that a supply drop costs 100 munitions and arrives in 30 seconds, is what separates a commander who salvages a draw from one who watches the team get rolled.
Commander Loadout and Role Progression
While the Commander spends most of their time on the map screen, they still need a viable combat loadout for the moments when they must fight. The Commander role has access to standard infantry weapons, but the loadout is less important than the strategic tools, because a Commander who is actively fighting is usually failing at their primary job.
That said, Commanders should choose a loadout that provides self-defense capability without encouraging frontline combat. A medium-range rifle with a bayonet, a pistol for close encounters, and smoke grenades for emergency escapes are the standard choices, because they allow the Commander to defend themselves without being tempted to engage in prolonged firefights.
Commander Role Unlock and Progression
The Commander role becomes available after reaching a certain level and completing specific progression requirements, according to the official game page. The role progression system rewards players who demonstrate leadership skills, and the fastest way to unlock the Commander role is to play as a squad leader and build a reputation for effective communication and strategic thinking.
Players who want to accelerate their progression should focus on: earning Combat Effectiveness (CE) through high-impact actions rather than raw kill counts. In the Vietnam setting, a single well-placed artillery strike that eliminates a garrison or outpost can yield more XP than 10 infantry kills, so prioritize dismantling enemy spawn structures with your wrench or satchel charges. Additionally, commanding supply drops that enable your team to build garrisons near the front line generates passive XP for each spawn your structures provide. Since the Commander role unlocks at Level 30, grinding these CE-focused tasks in the early game—especially by coordinating with your squad leads to mark priority targets—will shave hours off your grind compared to passive play.
-
Playing as squad leader in multiple matches to build leadership experience
-
Using the leadership channel effectively to coordinate squad actions
-
Placing outposts and garrisons consistently to demonstrate strategic awareness
-
Following the hell let loose vietnam beginner guide to understand the fundamentals before taking on the Commander role
The Commander role is not for everyone, but players who master it become the most valuable members of their team, capable of turning losing matches into victories through superior strategy and communication. In Hell Let Loose Vietnam, this means orchestrating the entire battlefield from the Command Map—prioritizing garrison placement over outposts for spawn resilience, timing supply drops to keep offensive garrisons alive, and coordinating with Squad Leaders to ensure recon units are marking artillery positions before a major push. A single well-executed Commander can dismantle a fortified defense by calling in a precision bombing run while simultaneously directing a flanking maneuver, transforming a stalled offensive into a decisive breakthrough that secures the final objective.
Frequently Asked Questions
What is the most important skill for a Commander in Hell Let Loose: Vietnam?
The most important skill is map awareness, because Commanders must track friendly and enemy positions, monitor garrison status, and anticipate enemy movements simultaneously. Without strong map awareness, even the best communication skills cannot compensate for poor strategic decisions, which is why most successful Commanders spend the majority of their time on the map screen.
How many garrisons should a Commander maintain during a match?
Commanders should maintain at least 3 active garrisons at all times: one defensive garrison near the current objective, one offensive garrison positioned for the next push, and one flanking garrison for tactical flexibility. This redundancy ensures the team can continue fighting if one garrison is destroyed and prevents the enemy from collapsing your entire spawn network with a single attack.
What is the supply drop cooldown and how should Commanders manage it?
Supply drops have a 5-minute cooldown per drop, so Commanders must call them proactively, not reactively. Keep 100 supplies in reserve for emergency garrison construction, and coordinate drop timing with squad leaders to avoid wasted resources. Prioritize aggressively in the opening minutes to establish the spawn network before the first contact.
How does the Commander coordinate with recon squads effectively?
Commanders should assign recon squads specific objectives at the start of each match, request regular status updates without micromanaging, and use recon intelligence to adjust garrison placement and artillery strikes. The leadership channel should be used to relay recon markings to other squad leaders, because infantry squads cannot always see the markers that recon units place on the map.
What is the difference between US and NVA Commander strategies?
The US Commander leverages helicopters for rapid supply drops and garrison establishment, favoring aggressive offensive play. Conversely, the NVA Commander relies on buildable tunnel networks as hidden spawn points, prioritizing defensive positioning within jungle terrain. Master garrison placement and supply management to exploit your faction's unique mobility advantage effectively.